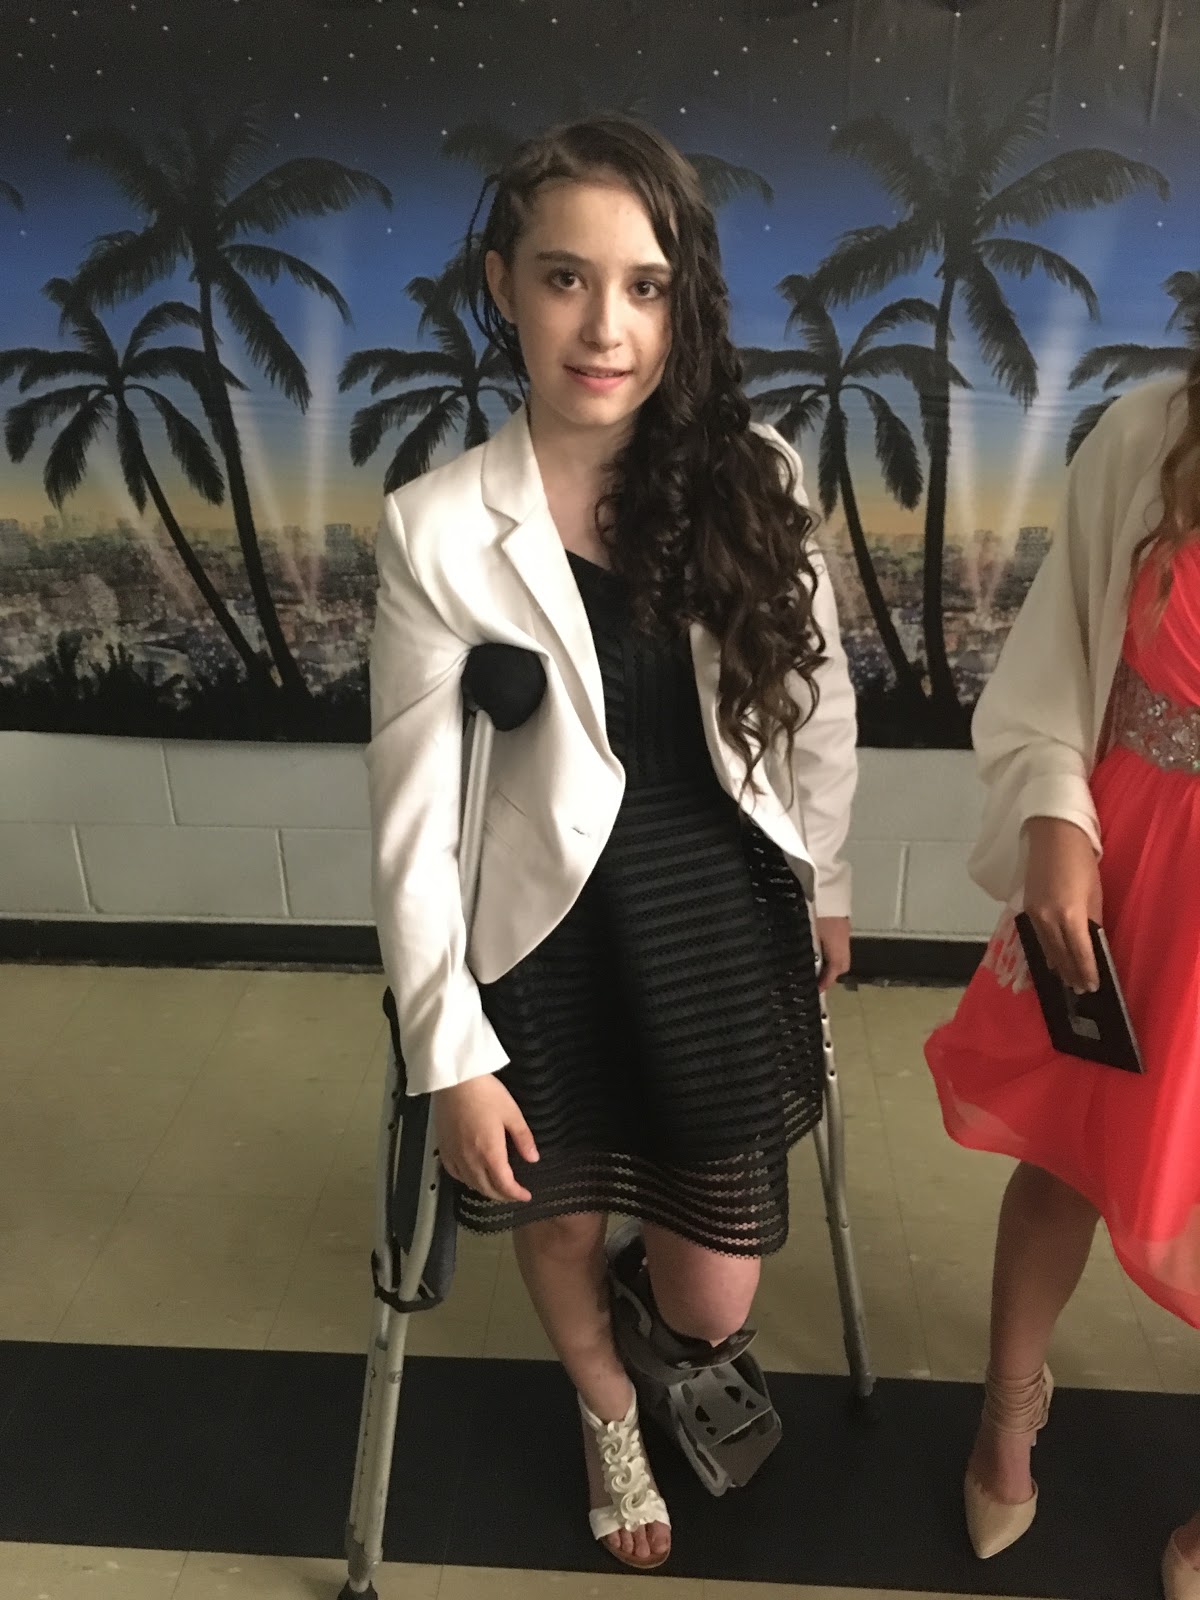
Tuesday, 24 January 2017

flipped over headband braids

Hi everyone, so i am sorry i have not been posting recently on any of my social medias. I will try harder over my second semester of high school, in the meantime; i thought it would be a good idea to teach you how to do this fairly simple hairstyle.

Level of skill
-medium

Skills needed
-Dutch braid, cornrows, or French braid
-Dividing

Materials
-1-3 hair elastics (depending if you want the hairstyle exactly like mine)
-Dividing comb
     Optional
-Hair cream
-Spray bottle

Steps

  1. First divide your hair from 1"/2.5 cm behind your ear, to the other ear. Pull back the remaining of the bottom section of hair. 
  2. Now divide the top section evenly into 2 sections. Pull the bottom section into another ponytail, so we can wok on the top section first. At this point you now have the option to add hair cream, or water to make the hairstyle more sleek and clean looking. 
  3. With the top section, you will now want to divide the whole section into 2 parts from your favoritism side part, (weather its the left side or the right side), just keep in mind that the bottom section you will be parting your hair on the opposite side section as you did the first time.
  4. Now instead of braiding the thin side section up like you would normally do braiding towards the other ear, we will be braiding this section down towards your direct ear that the side is parted towards. Be careful though to not braid this section of the hair all the way down as if you will be ending the braid, instead braid the thin side section to your shoulder then bend the braid at the base (where you stopped adding sections in) and make sure/continue braiding until the braid reaches the other heavier section of the hair. 
  5. At this point, once the thin section is bent and can reach all the way to the heavier section of hair, then you will be resuming a normal headband braid by braiding to the opposite ear.
  6. Now if you wish you may continue braiding the section all the way to the end of your hair. You can leave the hairstyle like this with one braid and pull it back into a ponytail or into a dutch braid, or you can repeat steps 3-6 except divide the hair in the opposite way then you did before. If you wish you can now leave your hair down, put it in a half up half down hairstyle or anything you wish to desire; like i did.


Sunday, 30 October 2016

high school, and i can finally walk again

hi everyone, so i realise i have not been posting regular on any of my accounts. for a matter of fact. i know you guys probably do not like being told excuses each  time i come on here for my absence. but i feel as if it is my responsibility to explain myself. so i thought i should tell you guys what i have been up to lately. before i do that, though i would like to thank my regular viewers of my blog
from almost 3 years ago when i first started this site. i appreciate all the support you have given me for all i have gone through in that 3 years which i have documented on my site. so thank you, and even if you are new i love each and all of you guys.
okay so now for the update... on my life once again.~
if you don't follow me on instagram @cornrowsjustforme or my other account fr my friends @hall_sarah7 , or music.Ly @cornrowsjustforme:
then you may not know that i have started grade nine in high school also known as freshmen year of high school.
    or click here to see the video of me walking
  1. i have been trying to learn American sign language (asl) for about 3 months (late July), and i absolutely love the language its so beautiful.
  2.  i have started to walk in august (about 2 weeks before labour day).
  3. and wow, has a lot of new experiences happened in high school. fun and embarrassing, just to hint at some things i walked into a door frame already, almost fell down the stairs, thought i was stuck in the bathroom, could not get the sink to work, hit my head off of a smart board. if you want more in depth stories and updates on stupid things i have done just tell e and i would keep you updated on that also.  even if you want some tips for high school that are not commonly talked about.
  4. i will try to make my next post about something you guys request so please comment ideas to post about in the comments or email me ideas at cornrowsjustforme@gmail.com

Sunday, 31 July 2016

Major update on my life, and my CRPS in my foot

How everyone so I know it's been along time since I last posted on here and that is because I was foucusing a lot on keeping my grades up, and most especially working on getting my foot better.
1) The first update I would like to give you, is that on June 21st,  2016 I graduated grade 8. Meaning in this following September I will be in grade 9 or a freshman (I belive). And I still have a lot of things to learn around highschool. So if you have any advice for me or for any fellow highschoolers reading my blog please comment it down below. Also I thought I would mention that, the award I won was for personal success. And here are some pics of me graduating, and my hairstyle.  


2)  Then on June 28th, 2016 I was put under with anastetics so the doctor could take a look at my foot and see if it could move (same went for my knee). And I ended up getting my Left foot casted at a 80 degree angle with a blue cast; for my knee I received a hinged leg brace which is locked at 15 degrees. Also I have so amazing news for you guys, and if you don't follow me on YouTube you won't already know… which is that I can sort of walk now. Without using crutches. Or you can click Here to view the YouTube video.


Friday, 25 December 2015

Birthday haul 2015 the day before Christmas


Hi everyone so today I thought it will be fun to show you what I got for my birthday (December 24th) that I turned 13. 
Here are a list of the things that I got for my birthday:
~ sweater 
~gloves 
~24-26" 100% brown manikin head 
~ manikin head base 
~ red, green, and white jubejubes on a stick 
~ pink kids satin bonet 
~ the Giver (movie) 
~ "strawberry fuision" tic tacs 
~ hair treatment kit 
~ voodoo doll 
~ 2 fancy ponytailers 
~ black, brown, and pink headbands 
~ white and blue long sleave top 
~ pink yarn sweater 

Sunday, 6 December 2015

Cool Side Cornrow Design.

Hi everyone so, today I am going to teach you this pretty neat cornrow design. That I did on one of my friends.

Level of skill...
~ easyish

Skills needed…
~ normal stand erred braid
~ cornrows (Dutch braid)
~ dividing

Materials…
~ dividing comb
~ ponytail { big elastics (not rubber ones)}
~  4 elastics
~ hair cream
~ water/spray bottle

Steps…
1)  Now, with your dividing comb, create a square/rectangle parting on the right or left side ( I did mine on the right side). Tie the remainder of the hair off with a ponytail.
2) Divide a straight horizontal parting, about 2cm width. Tie the rest off with a ponytail. Now apply what ever you want to make the cornrow stay neat; now cornrow that section straight. Continue branding it all the way to the end and tie it off with an elastic.
3) Next take the ponytail off of the hair recently tied. Divide more of a triangular parting, about 4cm back. Tie the rest off, apply what you want; and cornrow that section all the way to the bottom, tie it off with an elastic.
4) Make a diagonal part, tie the rest of the hair off. Apply what you want, then cornrow the hair all the way to the bottom then tie it with an elastic.
5) After you undo the bigger section of hair off, divide it one more time behind the ear. Once again tie the bottom section off, apply what you want cornrow the section; braid it all the way down and tie it off with an elastic. Undo the bottom section.
6) Now scince that section is not as large just, do a normal braid with it and tie it off.
*If you want after you completed this hairstyle you can end it all off with a big old braid to the side. A bonus thing with this hairstyle is that you can leave it in for more than a day.*
Do not forget that if you want a certain blog or video post about anything just ask and, I will see what I can do to make it work for me and you.

Saturday, 21 November 2015

Lace bun with an accent look

Hi everyone so at the moment this hairstyle is my go to, it is quick, simple, and fun. If you want to know how read on!

Level of skill… 
Easy

Skills needed to do…
- ponytail
-bun
-braid
-lace braid
-ponytail flip

Materials…
-dividing comb
-headband wrap
-topsey tail 
-about 3 plastic elastics (May vary)
-bun maker
-bobby pins

Steps…
1) Create a square shape dividing on the top of your head and tie it neatly off with an elastic. Now take your topsey tail and stick the long peice through the piney tail and put the hair in the loop and pull.
2) Then put all of your hair in a high ponytail.
3) Divide a quater of your hair out of the elastic. Place the bun maker on the 3/4 of your hair. Find the section you took out, comb all of the hair over the bun. 

4) Now section off the peice separated into 2 parts, grab another small section from the hair laying on the bun. Do one stick of the braid and add a section of hair only on the top section do this till you have no more hair to add in. Then braid it as far as you can. Tie the braid off with an elastic.
5) wrap the ends of the braid around the bun and secure with boby pins.
6) (Optonal) You can now put the headband wrap on your head.
7) (Optional) If you want to, you can now, pull some sections out, of the ponytail. To give a more relaxed look.

Comment down bellow for any hair tutorials or YouTube videos.

Thursday, 5 November 2015

3 walk through halloween hairstyles that can be done on any length

Hi everyone so I know it is a bit late to do this…but I really wanted to show you guys some Halloween hairstyles I did on myself, and my newish dog Honey (or what I call her chickmunk). To learn more about Chickmunk/Honey click Here. I will also give you a very quick overview on how to do all of the hairstyles. Another bonus is that you can do pretty much all of the hairstyles on very short hair, because I did most of them on Chickmunk and she has not even 15cm of hair that I worked with so let's move on.


The first hairstyle is…

It is called the 'buble Dutch spider' 
So all you need to do is get those plastic spider rings (I prefer the black ones) then I got some rose goldish nail polish and put some on the spiders so they pop out more, I figured that out after I did it in my hair and did it that way for Chickmunk. Now get a section of your hair tie it off with an elastic then simple thread the spider throught all if the hair in the elastic. If you have thick hair you can either get smaller sections or you can just thread the spider ring throught a small peice of the hair from the ponytail instead of all. Then divide another section of hair and tie it off with the first elastic to secure the spider. Repeat thease steps till you use all the hair desired. *Remember to end with an elastic after the spider secured to the head.*


Second hairstyle is…

This hairstyle I would say is the simplest (but can only be done with a small section of hair). The first step is to get a peice of hair and put it into a messy floppy bun. Then I simpley cut the spider ring and streached it across the base of the first elastic.


The third hairstyle is…

Now this hairstyle is called the "elastic spider web". To do this hairstyle you first need to divide a box shape ontop of your head, then divide that one box into 3 lengthwise sections. Then divide the first lengthwise section into 4 sections. With the first section put it into an elastic and take a bit of the hair out, add one of the sections of hair into the next ponytail. Repeat that step 3 more times for that row. Whitch the 2nd row repeat the steps above but add in the feathers pieces to each elastic. Then for the last row divide it into 4 sections  but this time just add in the featherd sections but don't take any sections out. 

I hope you liked this quick littel walk throught on how to do some Halloween hairstyles even though Halloween is over. 


Saturday, 19 September 2015

How to do milk maid braids

Hi every one today I am going to teach you how to do this very simple easy hairstyle called " Milk Maid Braids". This style is even simpler than it looks.


Skills needed to do this hairstyle are…

- any type of braid at all it could be a very simple braid or a hard braid. You could do a 3 strand braid, fishtail like how I did, pull through braid …
-  and of course just simple dividing skills.


Level of hairstyle…

-this is a very, very simple hairstyle.


Materials needed to do this hairstyle…

- dividing comb
- spray bottle with water ( optional just tames flyaways instead of using any hair product).
- or hair prouduct ( optional )
- 2 plastic elastics 
- and a handful of bobby pins. 
- long/ middel length hair
-hairspray (optional)
-1 ponytail elastic


Steps how to so this hairstyle…

1. First brush through your hair so there are no tangles. Then divide your hair with a dividing comb into 2 equal sections. What I did is I did a left side part for about 10 cm length wise and went stright down after that. After you are done that then hold one section out of the way with a ponytail.
2. Now you can either spray the section of hair that is not in a ponytail with water or you can use some sort of product just to tame flyaways. (Optional) Or for a softer look don't use and prouduct of water at all.
3. Here is the fun part, you can do almost any type of braid with the losse section except braids that make the hair pieces shorter than the others. I did a simple fishtail braid you can do a 3 strand braid… start the braid off right behind your ear.
          

          How to do a fishtail (vauge details)
1. Divide the section of hair that you are working with into 2 equal sections. Hold one section in one hand and the other section in your other hand.
2. Then just take small sections from the outer edge side and pass it over to the inner edge side. Only do one side at a time. Countinue this process till you get to the disired length. Keep in mind that this braid dose take a bit long. (Comment down below for a video on how to do a fishtail or more in depth)

4. After you are done doing the braid all the way to the end of your hair tie it off with a plastic elastic. Repeat this to the other side too.
5. (Optional you can spray the boby pins with some hair spray to keep the boby pins stay in your hair longer.) 
6. Now twist the braid one time and flop it right on your head if that makes scence and secure the braid to your head with the boby pins wherever needed. Repeat this step with the other side but this time flop the braid and hide the ends of the other braid with the beginning of this braid and boby pin it where it needs to be pined.  After you are done that hide the new end of the braid by tucking it under the other braid. You can pull out any sections just depends on the look you are going for.
That is it now you made you very own Milk Maid Braids.

Comment down bellow for any hair tutorials or YouTube videos.

Volleyball type cornrow style


Hi everyone if you want to learn how to do this hairstyle please stick around to the end of this post. (Note to self that this hairstyle is a bit tricky because of the circular parting needed)


Skills needed…

-have to be able to do cornrows, or Dutch braids.
-be able to divide a circle pretty good.
-ponytail 
- if you want me to do a YouTube video on how to do this hairstyle either just comment down bellow asking or you can email me at cornrowsjustforme@gmail.com if you want to ask me that way too.


Level…

- medium I found the hardest part was dividing the circle.


Materials needed…

- dividing comb/ rat tail comb
-spray bottle full of water ( optional but recommended) 
- hair cream or gel to make it look neater( optional but highly recommended) 
- 8 plastic elastics
- 4 poney tails


Steps…

1. Divide a circle on top of your head near your forehead. Tie the reast of your hair off. 
2. Then divied sort of like a PAC  man shape starting from the angle of your left eyebrow then curve the dividing to the left side. Then tie the new dividing off with a pony tail. 


3.  Now with the hair that is not tied off, divied that section into 4 as equal sections sort of on an angle. Cornrow all 4 sections all the way to the bottom of your hair. Tie the braids off with 1 plastic elastic off.
Now tie all 4 of those braids off with an elastic togather.
5. You can now untie the pony tail  that is holding your PAC man like shape, then divied that whole section into 3 cornrow slots. Make sure to curve the braids when cornrowing. Then tie the bottom part of the braids off with plastic elastics. The overall hairstyle should look some thing like this.
You can curl the rest of your hair or just leave the hairstyle as is. Personally instead of tieing an elastic to the base of all of the braids I just weaved the 3 braids though the 4 braids, then tied the 3 elastics off; I then weaved the 4 braids through the 3 braids and tied the 4 braids off. I repeated this step all the way to the end of my hair.
     Here are some more pictures of this hairstyle.

Monday, 31 August 2015

Crutch buddies

Hi everyone so if you have been following me lately on my blog and instagram---- then you will probably know that I broke my left foot in late September,2014. And soon after developed a pain full disease called COMPLEX REGINAL PAIN SYNDROME (CRPS) also known as REFLEX SYMPATHETIC DYSTROPHY (RSD) I have blog and YouTube posts about CRPS which you can check out if you are interested here  My first blog post about CRPS in my ,  My second blog post about CRPS YouTube video ,   my first YOUTUBE video about CRPS in my foot (direct link) ,  My third blog post about CRPS in my foot and my new puppy Honey Bee  .


And with this painful disease, I have to use crutches to get along and walk because the pain is much to high to walk on it. When I started to used my crutches,  in probably about one month, my armpits were all sore and bruised up. So me and my mom slowly began looking online for something help ease the pain. Then we stumbled across this awesome brand called "Crutch Buddies" which is a veteran owned company. This brand promises and does stop the armpit  pain with padded fleece crutch covers and grips, they also have cool bags for iPhones or water bottles.  They also come in many solid colours such as black, navy blue, and pink...  You can order your own set either here or on  Amazon . 

 Thanks for reading and enjoy your day, comments are always welcome.

Disclaimer: this blog post is not sponsored by " Crutch Buddies" this is my own thoughts about this company.